UNIX/Linux MP Authoring – Dynamic Discovery of Roles & Applications
July 25, 2013 Leave a comment
In a previous post, I demonstrated the use of Operations Manager’s “Shell Command Templates” to customize monitoring by creating a management pack for monitoring BIND DNS servers. The Shell Command Templates offer a great deal of customization potential through simple wizards, but one limitation is that the templates require the target class to already be defined. In other words, they cannot dynamically discover the presence of an application/role on monitored computers. One way to generate a custom class to represent an application or role is to create a UNIX/Linux Process Monitor with the MP Template and target the Process Monitor to a group containing the UNIX/Linux computers running this service. This will create a custom class representing the process, which can be used as a target for the Shell Command Templates. However, this still requires that the group members are explicitly defined, or dynamically populated based on properties such as the hostname. Such an approach is not a bad option at all, but still not quite dynamic discovery. However, with the UNIX/Linux Authoring Library examples, creating a dynamic discovery of an application or role is a fairly easy undertaking. In this post, I will revisit that prior BIND DNS monitoring walkthrough, but demonstrate how the UNIX/Linux Authoring Library can be used to dynamically discover the DNS servers.
Note: the example MP described in this blog post (and the VSAE project) can be found in the \ExampleMPs folder of the UNIX/Linux Authoring Library .zip file.
Walkthrough: Dynamic Discovery for UNIX/Linux, using the Authoring Library examples
I will use the Visual Studio Authoring Extensions for this project, so starting the project entails creating a new MP project:

Following the direction in the Getting Started documentation for the UNIX/Linux Authoring Library, I will then set up MP references and aliases. The suggested references in the Getting Started documentation are mostly sufficient, but I will add Microsoft.Linux.Library.mp (with an alias of Linux) as well in order to target discoveries to the Microsoft.Linux.Computer class.
| Management Pack ID | Alias |
| Microsoft.Linux.Library | Linux |
| Microsoft.SystemCenter.DataWarehouse.Library | SCDW |
| Microsoft.SystemCenter.Library | SC |
| Microsoft.SystemCenter.WSManagement.Library | WSM |
| Microsoft.Unix.Library | Unix |
| Microsoft.Windows.Library | Windows |
| System.Health.Library | Health |
| System.Library | System |
| System.Performance.Library | Perf |
| Unix.Authoring.Library | UnixAuth |
Discovering BIND DNS Servers
I’ll use a basic shell command to detect the installation of BIND on Linux computers in order to dynamically discover it. This method could be used in multiple ways, such as:
- Check for the presence of a file or directory (such as an installation directory, init script in /etc/init.d, or configuration file)
- Check for an installed package with a package manager like rpm
- Check for a running process with ps
In this case, I’ll look for a config file to indicate that BIND is installed on the computer. Depending on the UNIX/Linux distro, and version of the application, the artifacts on the system that indicate the installation of the application may vary. In my example, with BIND 9 on CentOS, I will look for the existence of /etc/named.conf to indicate that BIND is installed. The command I will use is: ls /etc/named.conf |wc –l This will return a value of 1 if the file exists, and 0 if it does not.
To add the dynamic discovery to the MP, I will add a new Empty Management Pack Fragment to the VS project, named Discoveries.mpx.

Then, I will copy the example code from the Discovering a UNIX/Linux Role section of the documentation into the new Management Pack Fragment. This example code defines a class based on Microsoft.Unix.ComputerRole as well as a Group based on Microsoft.SystemCenter.ComputerGroup, along with discoveries for each. There are a number of elements in the example code that need to be modified to make the example viable.
Firstly, I’ll set the properties of the classes:
| <TypeDefinitions>
<EntityTypes> <ClassTypes> <!– Class definition for a UNIX/Linux Computer Role –> <ClassType ID=”Linux.BINDDNS.Server” Abstract=”false” Accessibility=”Public” Hosted=”true” Singleton=”false” Base=”Unix!Microsoft.Unix.ComputerRole”> <Property ID=”RoleName” Type=”string” Key=”true” /> </ClassType> <!– Class definition for a Computer Group –> <ClassType ID=”Linux.BINDDNS.Server.Group” Accessibility=”Public” Abstract=”false” Base=”SC!Microsoft.SystemCenter.ComputerGroup” Hosted=”false” Singleton=”true” Extension=”false” /> </ClassTypes> </EntityTypes> </TypeDefinitions> |
And the corresponding DisplayStrings:
| <DisplayString ElementID=”Linux.BINDDNS.Server”>
<Name>Linux DNS Server</Name> <Description></Description> </DisplayString> <DisplayString ElementID=”Linux.BINDDNS.Server” SubElementID=”RoleName”> <Name>Role Name</Name> <Description></Description> </DisplayString> <DisplayString ElementID=”Linux.BINDDNS.Server.Group”> <Name>Linux DNS Server Group</Name> <Description>Group containing all Linux servers running BIND DNS Server</Description> </DisplayString> |
Then the discoveries need to be modified to reflect the IDs and properties of the Classes, as well as the logic used in the Discovery. The UNIX/Linux Authoring Library has multiple variations of Shell Command/Shell Script data sources, but the simple Shell Command permutation in the example is sufficient for this case. The group population discovery has a membership rule that will populate the group with any computers hosting the defined ComputerRole.
| <!– Discovery to discover instances of a Computer Role on UNIX/Linux computers, using a Shell Command –>
<Discovery ID=”Linux.BINDDNS.Server.Discovery” Target=”Linux!Microsoft.Linux.Computer” Enabled=”true” ConfirmDelivery=”false” Remotable=”true” Priority=”Normal”> <Category>Discovery</Category> <DiscoveryTypes> <DiscoveryClass TypeID=”Linux.BINDDNS.Server”> <Property TypeID=”Linux.BINDDNS.Server” PropertyID=”RoleName” /> </DiscoveryClass> </DiscoveryTypes> <DataSource ID=”DS” TypeID=”UnixAuth!Unix.Authoring.TimedShellCommand.Discovery.DataSource”> <Interval>28800</Interval> <TargetSystem>$Target/Property[Type=”Unix!Microsoft.Unix.Computer”]/PrincipalName$</TargetSystem> <ShellCommand>ls /etc/named.conf |wc -l</ShellCommand> <Timeout>60</Timeout> <UserName>$RunAs[Name=”Unix!Microsoft.Unix.ActionAccount”]/UserName$</UserName> <Password>$RunAs[Name=”Unix!Microsoft.Unix.ActionAccount”]/Password$</Password> <FilterExpression> <RegExExpression> <ValueExpression> <XPathQuery>//*[local-name()=”StdOut”]</XPathQuery> </ValueExpression> <Operator>MatchesRegularExpression</Operator> <Pattern>^1</Pattern> </RegExExpression> </FilterExpression> <ClassId>$MPElement[Name=”Linux.BINDDNS.Server”]$</ClassId> <InstanceSettings> <Settings> <Setting> <Name>$MPElement[Name=’Linux.BINDDNS.Server’]/RoleName$</Name> <Value>BIND DNS</Value> </Setting> <Setting> <Name>$MPElement[Name=’Unix!Microsoft.Unix.Computer’]/PrincipalName$</Name> <Value>$Target/Property[Type=”Unix!Microsoft.Unix.Computer”]/PrincipalName$</Value> </Setting> <Setting> <Name>$MPElement[Name=’System!System.Entity’]/DisplayName$</Name> <Value>BIND DNS</Value> </Setting> </Settings> </InstanceSettings> </DataSource> </Discovery> <!– Discovery to populate a Computer Group with computers hosting the Role–> <Discovery ID=”Linux.BINDDNS.Server.Group.Discovery” Enabled=”true” Target=”Linux.BINDDNS.Server.Group” ConfirmDelivery=”false” Remotable=”true” Priority=”Normal”> <Category>Discovery</Category> <DiscoveryTypes> <DiscoveryRelationship TypeID=”SC!Microsoft.SystemCenter.ComputerGroupContainsComputer” /> </DiscoveryTypes> <DataSource ID=”GroupPopulationDataSource” TypeID=”SC!Microsoft.SystemCenter.GroupPopulator”> <RuleId>$MPElement$</RuleId> <GroupInstanceId>$MPElement[Name=”Linux.BINDDNS.Server.Group”]$</GroupInstanceId> <MembershipRules> <MembershipRule> <MonitoringClass>$MPElement[Name=”Unix!Microsoft.Unix.Computer”]$</MonitoringClass> <RelationshipClass> $MPElement[Name=”SC!Microsoft.SystemCenter.ComputerGroupContainsComputer”]$ </RelationshipClass> <Expression> <Contains> <MonitoringClass>$MPElement[Name=”Linux.BINDDNS.Server”]$</MonitoringClass> </Contains> </Expression> </MembershipRule> </MembershipRules> </DataSource> </Discovery> |
And the corresponding DispayStrings:
| <DisplayString ElementID=”Linux.BINDDNS.Server”>
<Name>Linux DNS Server</Name> <Description></Description> </DisplayString> <DisplayString ElementID=”Linux.BINDDNS.Server” SubElementID=”RoleName”> <Name>Role Name</Name> <Description></Description> </DisplayString> <DisplayString ElementID=”Linux.BINDDNS.Server.Group”> <Name>Linux DNS Server Group</Name> <Description>Group containing all Linux servers running BIND DNS Server</Description> </DisplayString> <DisplayString ElementID=”Linux.BINDDNS.Server.Discovery”> <Name>Discover Linux DNS Servers</Name> <Description></Description> </DisplayString> <DisplayString ElementID=”Linux.BINDDNS.Server.Group.Discovery”> <Name>Populate Linux DNS Server Group</Name> <Description></Description> </DisplayString>
|
At this point, I’ll run a build of the MP project and make sure that it builds successfully and that MP Verify doesn’t flag any errors.

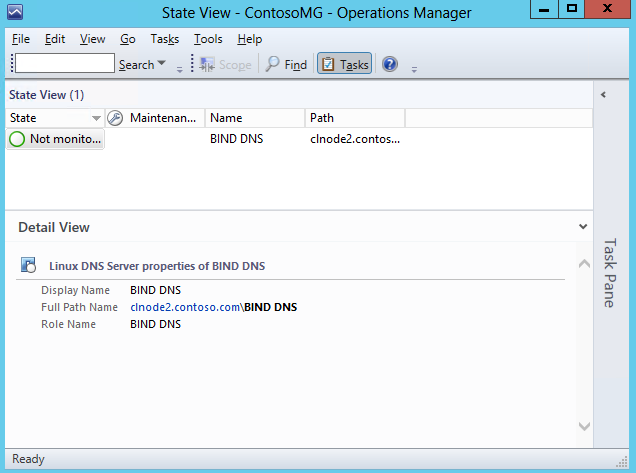
Adding Views for the Role
Prior to importing the MP, I would like to add some views to the MP, such as alert, state, and diagram views. To do this, I will create a new Empty Management Pack Fragment (named ConsoleViews.mpx) and copy the example code from the Creating Views for the UNIX/Linux Role documentation. From there, it is the same process of replacing the ## ## flagged elements in the example code with values reflecting my custom classes. Then, one more build and the MP is ready to import and test.
Adding Monitoring
With just the minimal MP authoring described in the previous steps, this MP can now dynamically discover instances of a class representing Linux BIND DNS servers. To keep the MP authoring as simple as possible, the UNIX/Linux Process Monitoring template and Shell Command Templates can be used to create the actual monitors, just as in the earlier blog post – only this time, the DNS servers are dynamically discovered.
To create the Process monitor, I will use the Wizard, but target the Linux DNS Servers Group

Likewise, the Shell Command monitors described in the previous post can be created with the target Linux DNS Server, so that they run against the dynamically discovered DNS servers.

Summary
Dynamic discovery of Roles/Applications is a powerful tool for automating the deployment of targeted monitoring. While this functionality has always required MP authoring, using the UNIX/Linux Authoring Library examples, along with the Visual Studio Authoring Extensions, can greatly streamline this process. The same approach can be used for many types of role/application discoveries for monitored UNIX/Linux computers, and facilitates the addition of rules and monitors for the discovered instances with either the templates in the Operations Console or with MP Authoring.
